This is an automated email from the ASF dual-hosted git repository.

haonan pushed a commit to branch master
in repository https://gitbox.apache.org/repos/asf/iotdb.git
The following commit(s) were added to refs/heads/master by this push:
new 44b76ae [IOTDB-2591] fix doc of using OIDC as the authority
authentication service (#5108)
44b76ae is described below
commit 44b76aef626c9ebc6dac0d19edc91331a48ec532
Author: CloudWise-Lukemiao
<[email protected]>
AuthorDate: Wed Feb 23 16:17:07 2022 +0800
[IOTDB-2591] fix doc of using OIDC as the authority authentication service
(#5108)
---
.../UserGuide/QuickStart/Command-Line-Interface.md | 25 +++++++++++++++++++++-
.../UserGuide/QuickStart/Command-Line-Interface.md | 24 ++++++++++++++++++++-
2 files changed, 47 insertions(+), 2 deletions(-)
diff --git a/docs/UserGuide/QuickStart/Command-Line-Interface.md
b/docs/UserGuide/QuickStart/Command-Line-Interface.md
index 8ec1e26..f51e9bd 100644
--- a/docs/UserGuide/QuickStart/Command-Line-Interface.md
+++ b/docs/UserGuide/QuickStart/Command-Line-Interface.md
@@ -150,6 +150,29 @@ Shell >./standalone.sh
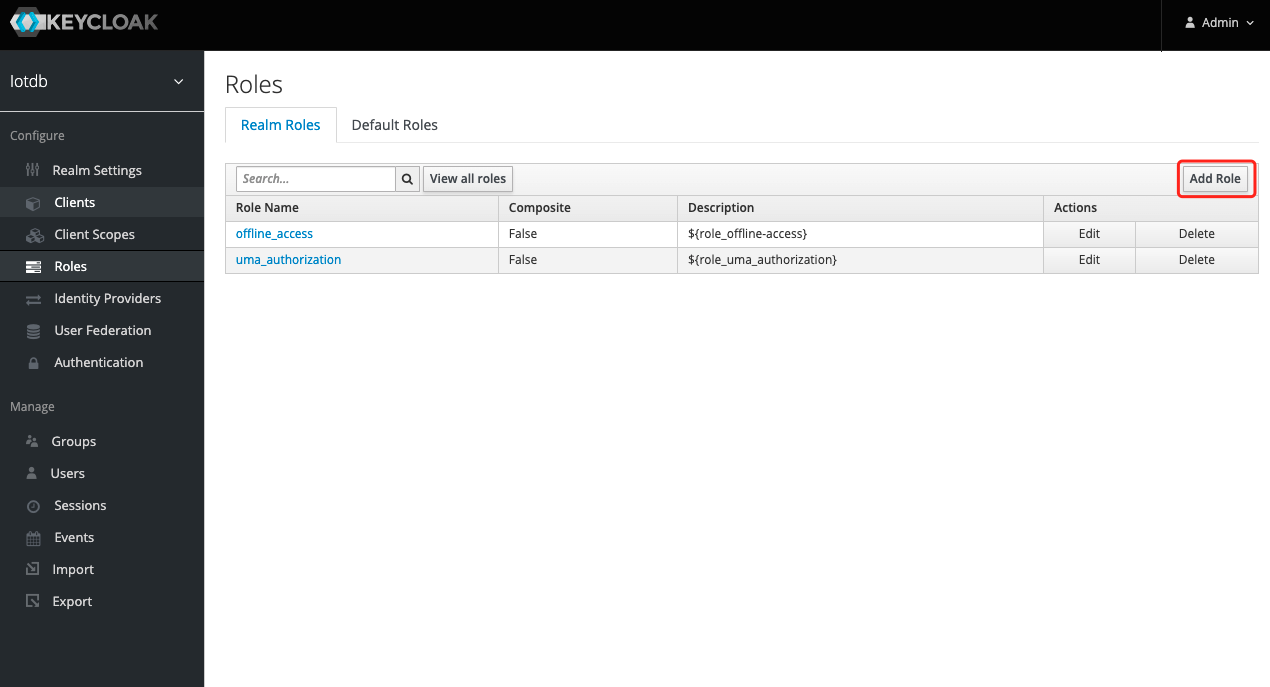
+8、To create a role, click Roles on the left menu and then click the Add Role
button to add a role
+
+
+
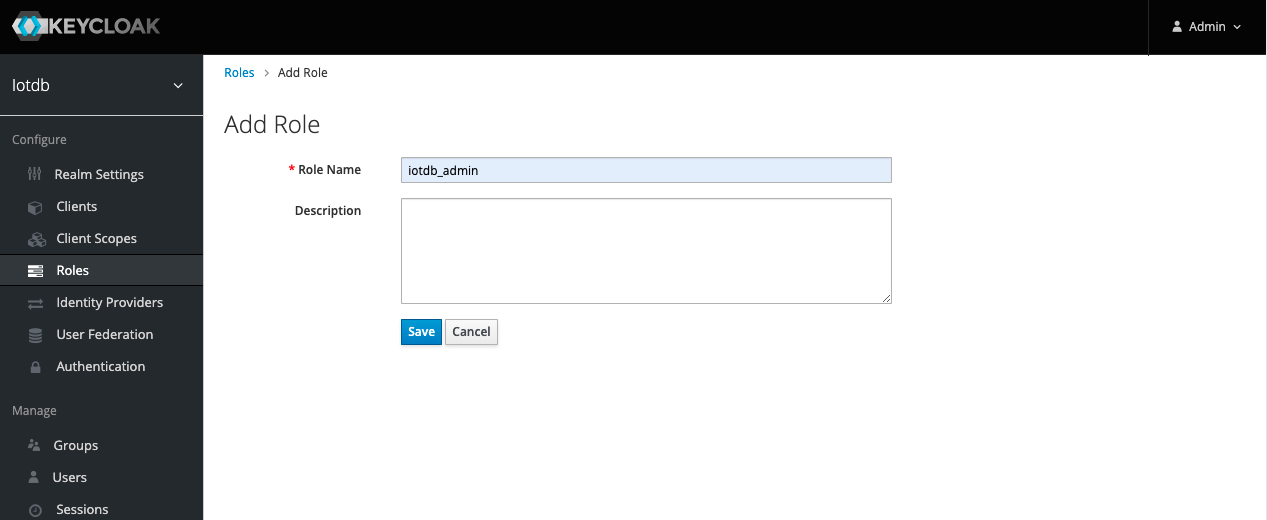
+9、 Enter `iotdb_admin` in the Role Name and click the save button. Tip:
`iotdb_admin` here cannot be any other name, otherwise even after successful
login, you will not have permission to use iotdb's query, insert, create
storage group, add users, roles and other functions
+
+
+
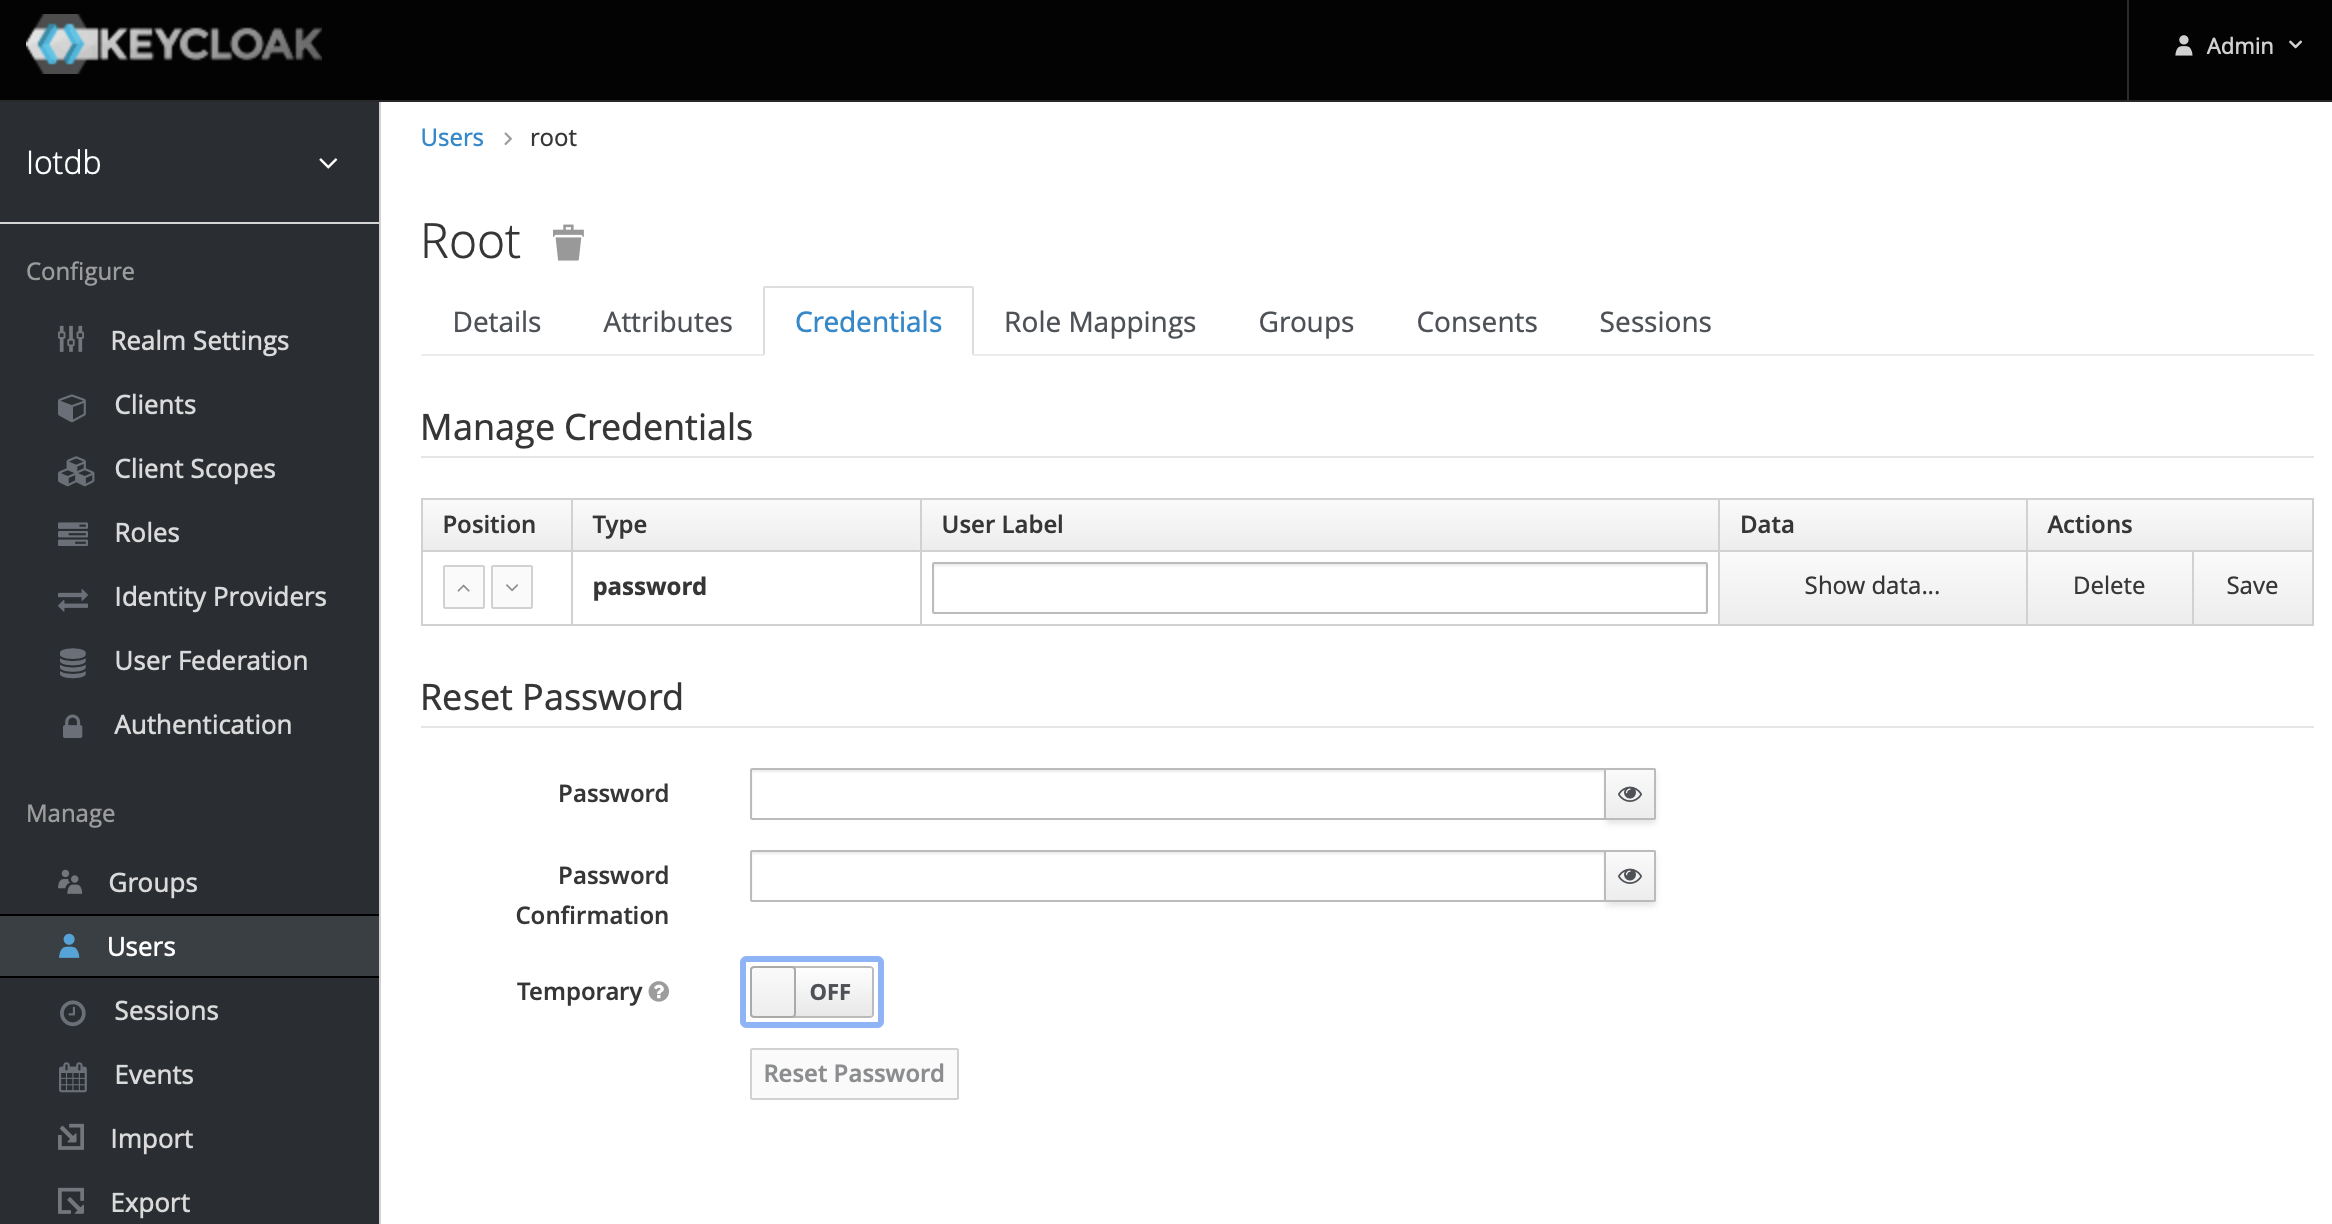
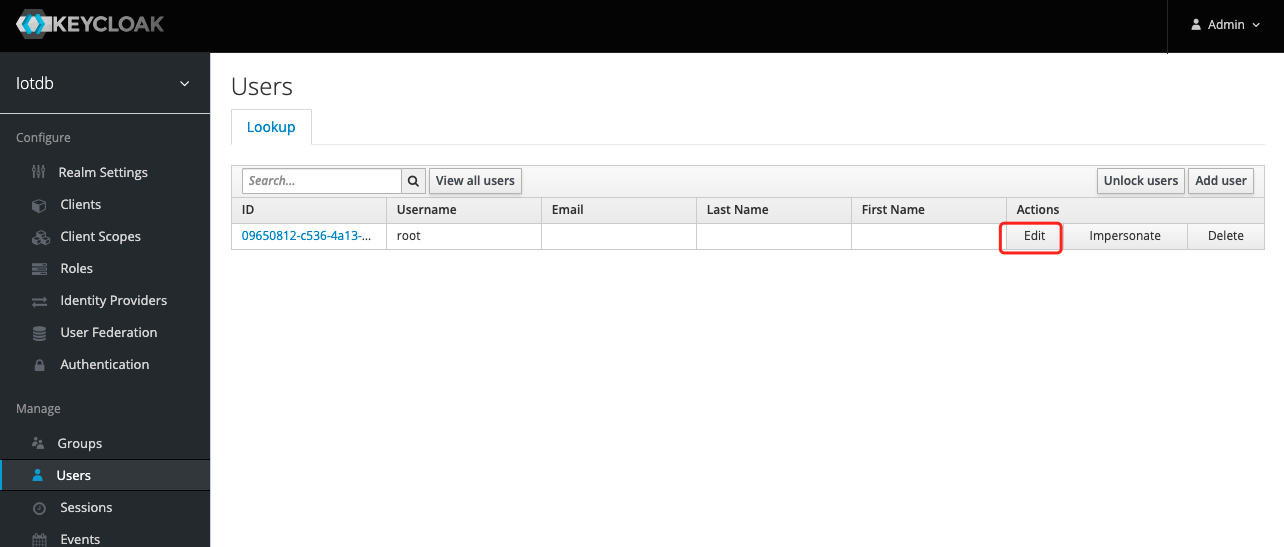
+10、Click the User menu on the left and click the Edit button in the user list
to add the `iotdb_admin` role we just created for this user
+
+
+
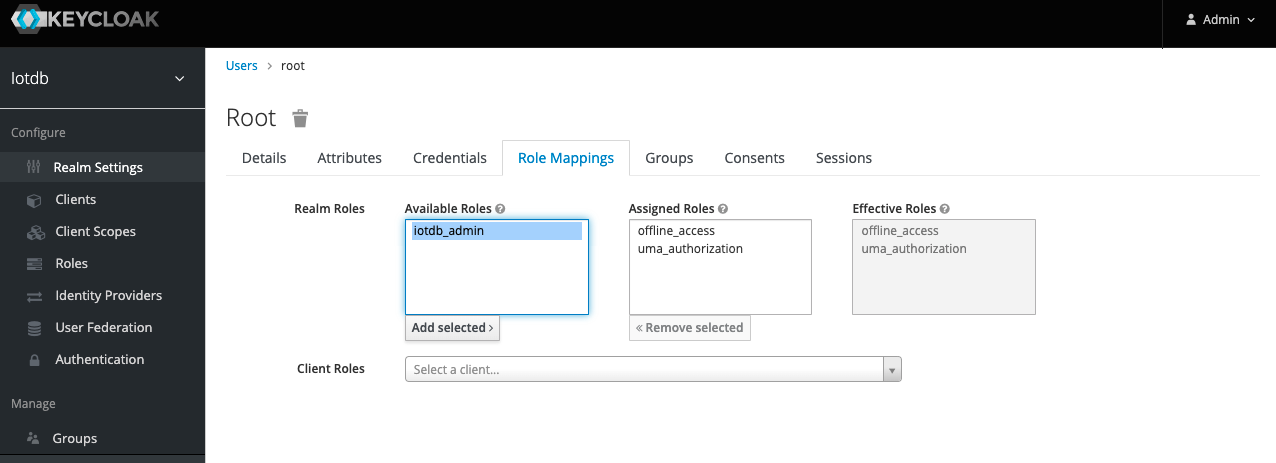
+11、 Select Role Mappings, select the `iotdb_admin` role in Available Role and
click the Add selected button to add the role
+
+
+
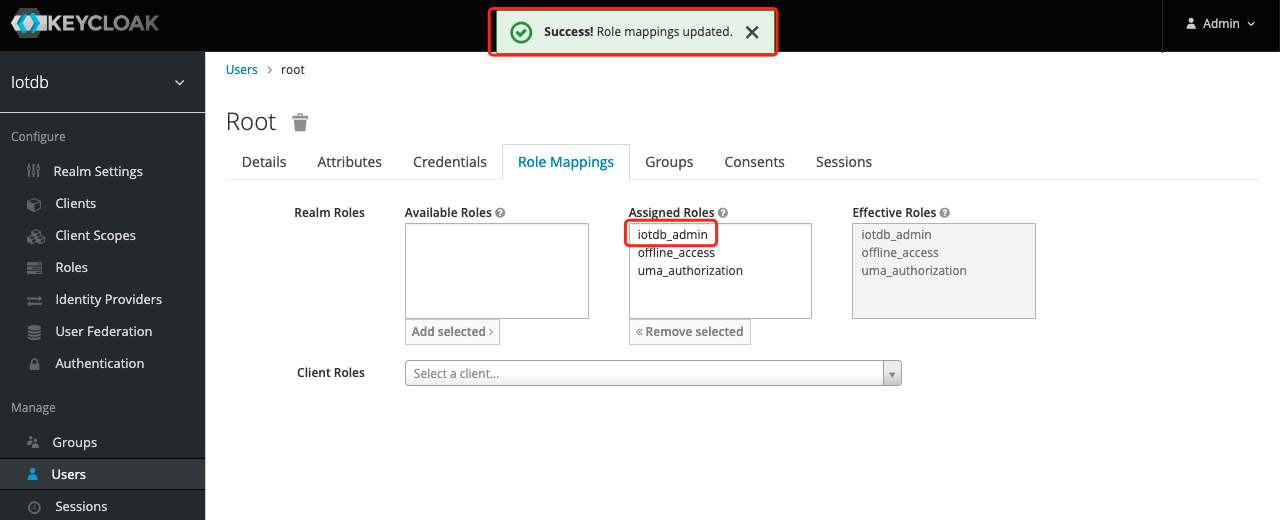
+12. If the `iotdb_admin` role is in Assigned Roles and the `Success Role
mappings updated` prompt appears, it proves that the role was added successfully
+
+
+
+
+Tip: If the user role is adjusted, you need to regenerate the token and log in
to iotdb again to take effect
+
The above steps provide a way for keycloak to log into iotdb. For more ways,
please refer to keycloak configuration
If OIDC is enabled on server side then no username / passwort is needed but a
valid Access Token from the OIDC Provider.
@@ -172,7 +195,7 @@ curl -X POST
"https://{your-keycloack-server}/auth/realms/{your-realm}/protocol/
-d "username={username}" \
-d "password={password}" \
-d 'grant_type=password' \
- -d "client_id=iotdb"
+ -d "client_id=iotdb-client"
```
The response looks something like
diff --git a/docs/zh/UserGuide/QuickStart/Command-Line-Interface.md
b/docs/zh/UserGuide/QuickStart/Command-Line-Interface.md
index b2d1858..35eb2fe 100644
--- a/docs/zh/UserGuide/QuickStart/Command-Line-Interface.md
+++ b/docs/zh/UserGuide/QuickStart/Command-Line-Interface.md
@@ -139,6 +139,28 @@ Shell >./standalone.sh

+8、创建角色,点击左侧菜单的 Roles然后点击Add Role 按钮添加角色
+
+
+
+9、在Role Name 中输入`iotdb_admin`,点击save
按钮。提示:这里的`iotdb_admin`不能为其他名称否则即使登陆成功后也将无权限使用iotdb的查询、插入、创建存储组、添加用户、角色等功能
+
+
+
+10、点击左侧的User 菜单然后点击用户列表中的Edit的按钮为该用户添加我们刚创建的`iotdb_admin`角色
+
+
+
+11、选择Role Mappings ,在Available Role选择`iotdb_admin`角色然后点Add selected 按钮添加角色
+
+
+
+12、如果`iotdb_admin`角色在Assigned Roles中并且出现`Success Role mappings
updated`提示,证明角色添加成功
+
+
+
+提示:如果用户角色有调整需要重新生成token并且重新登陆iotdb才会生效
+
以上步骤提供了一种 keycloak 登陆 iotdb 方式,更多方式请参考 keycloak 配置
若对应的 IoTDB 服务器开启了使用 OpenID Connect (OIDC) 作为权限认证服务,那么就不再需要使用用户名密码进行登录。
@@ -159,7 +181,7 @@ curl -X POST
"http://{your-keycloack-server}/auth/realms/{your-realm}/protocol/o
-d "username={username}" \
-d "password={password}" \
-d 'grant_type=password' \
- -d "client_id=iotdb"
+ -d "client_id=iotdb-client"
```
示例结果如下: