eric-haibin-lin closed pull request #10013: [MXNET-48] update on setting up
Scala with MXNet and the IntelliJ IDE
URL: https://github.com/apache/incubator-mxnet/pull/10013
This is a PR merged from a forked repository. As GitHub hides the original diff on merge, it is displayed below for the sake of provenance: As this is a foreign pull request (from a fork), the diff is supplied below (as it won't show otherwise due to GitHub magic): diff --git a/docs/tutorials/index.md b/docs/tutorials/index.md index 917afe92837..00a15046ab9 100644 --- a/docs/tutorials/index.md +++ b/docs/tutorials/index.md @@ -2,10 +2,10 @@ MXNet has two primary high-level interfaces for its deep learning engine: the Gluon API and the Module API. Tutorials for each are provided below. -The difference between the two is an imperative versus symbolic programming style. Gluon makes it easy to prototype, build, and train deep learning models without sacrificing training speed by enabling both (1) intuitive imperative Python code development and (2) faster execution by automatically generating a symbolic execution graph using the hybridization feature. - `TL;DR:` If you are new to deep learning or MXNet, you should start with the Gluon tutorials. +The difference between the two is an imperative versus symbolic programming style. Gluon makes it easy to prototype, build, and train deep learning models without sacrificing training speed by enabling both (1) intuitive imperative Python code development and (2) faster execution by automatically generating a symbolic execution graph using the hybridization feature. + The Gluon and Module tutorials are in Python, but you can also find a variety of other MXNet tutorials, such as R, Scala, and C++ in the [Other Languages API Tutorials](#other-mxnet-api-tutorials) section below. [Example scripts and applications](#example-scripts-and-applications) as well as [contribution](#contributing-tutorials) info is below. @@ -246,7 +246,8 @@ The Gluon and Module tutorials are in Python, but you can also find a variety of - [Setup your MXNet with Scala on IntelliJ](/tutorials/scala/mxnet_scala_on_intellij.html) - [MNIST with the Scala API](/tutorials/scala/mnist.html) - [Use Scala to build a Long Short-Term Memory network that generates Barack Obama's speech patterns](/tutorials/scala/char_lstm.html) -</div> + +</div> <!--end of scala--> <hr> diff --git a/docs/tutorials/scala/README.md b/docs/tutorials/scala/README.md new file mode 100644 index 00000000000..0081f9c8216 --- /dev/null +++ b/docs/tutorials/scala/README.md @@ -0,0 +1,7 @@ +# MXNet-Scala Tutorials + +* [Setup Scala with MXNet and Create a MXNet-Scala Project with IntelliJ](mxnet_scala_on_intellij.md) +* [MNIST with MXNet-Scala](mnist.md) +* [Character-level Language Model with MXNet-Scala](char_lstm.md) + +See the [tutorials](http://mxnet.incubator.apache.org/tutorials/index.html#other-languages-api-tutorials) page on MXNet.io for more. diff --git a/docs/tutorials/scala/mxnet_scala_on_intellij.md b/docs/tutorials/scala/mxnet_scala_on_intellij.md index 037165fa0d7..8a14767d56b 100644 --- a/docs/tutorials/scala/mxnet_scala_on_intellij.md +++ b/docs/tutorials/scala/mxnet_scala_on_intellij.md @@ -1,62 +1,295 @@ # Run MXNet Scala Examples Using the IntelliJ IDE +<!--TODO: switch to new namespace and new maven package --> + This tutorial guides you through setting up a Scala project in the IntelliJ IDE and shows how to use an MXNet package from your application. ## Prerequisites: -To use this tutorial, you need: +To use this tutorial you need the following items, however after this list, installation info for macOS is provided for your benefit: + +- [Java 8 JDK](http://www.oracle.com/technetwork/java/javase/downloads/index.html) +- [Maven](https://maven.apache.org/install.html) +- [Scala](https://www.scala-lang.org/download/) - comes with IntelliJ, so you don't need to install it separately +- [MXNet Shared Library and Scala Package](#build-the-mxnet-shared-library-and-scala-package) +- [IntelliJ IDE](https://www.jetbrains.com/idea/) + +## Mac Prerequisites Setup + +For other operating systems, visit each Prerequisite's website and follow their installations instructions. For macOS, you're in luck: + +1. Install brew: +``` +/usr/bin/ruby -e "$(curl -fsSL https://raw.githubusercontent.com/Homebrew/install/master/install)" +``` + +2. Install Java 8 JDK: +``` +brew tap caskroom/versions +brew cask install java8 +``` + +3. Install maven: +``` +brew update +brew install maven +``` + +## Build the MXNet Shared Library and Scala Package + +This depends on your operating system. Instructions for macOS, Ubuntu, and Windows are provided: + + +OS | Step 1 | Step 2 +---|---|--- +macOS | [Shared Library for macOS](http://mxnet.incubator.apache.org/install/osx_setup.html#build-the-shared-library) | [Scala Package for macOS](http://mxnet.incubator.apache.org/install/osx_setup.html#install-the-mxnet-package-for-scala) +Ubuntu | [Shared Library for Ubuntu](http://mxnet.incubator.apache.org/install/ubuntu_setup.html#installing-mxnet-on-ubuntu) | [Scala Package for Ubuntu](http://mxnet.incubator.apache.org/install/ubuntu_setup.html#install-the-mxnet-package-for-scala) +Windows | [Shared Library for Windows](http://mxnet.incubator.apache.org/install/windows_setup.html#build-the-shared-library) | [Scala Package for Windows](http://mxnet.incubator.apache.org/install/windows_setup.html#installing-the-mxnet-package-for-scala) -- [Maven 3](https://maven.apache.org/install.html). -- [Scala 2.11.8](https://www.scala-lang.org/download/2.11.8.html). -- MXNet. See the instructions for your operating system in [Setup and Installation](http://mxnet.io/install/index.html). -- The MXNet package for Scala. For installation instructions, see [this procedure](http://mxnet.io/get_started/osx_setup.html#install-the-mxnet-package-for-scala). -- [IntelliJ IDE](https://www.jetbrains.com/idea/). + +## Build Scala from an Existing MXNet Installation +If you have already built MXNet **from source** and are looking to setup Scala from that point, you may simply run the following from the MXNet source root: + +``` +make scalapkg +make scalainstall +``` ## Set Up Your Project -- Install the plugin for IntelliJ IDE by following these steps: - On **Menu**, choose **Preferences**, choose **Plugins**, type **Scala**, and then choose **Install**. +Now that you've installed your prerequisites, you are ready to setup IntelliJ and your first MXNet-Scala project! + +1. Install and setup IntelliJ: + - When prompted for what to features to enable during IntelliJ's first startup, make sure you select Scala. -- Follow the instructions for [Scala plugin setup for IDE](https://www.jetbrains.com/help/idea/2016.3/scala.html). + - Install the plugin for IntelliJ IDE by following these steps: + On **Menu**, choose **Preferences**, choose **Plugins**, type **Scala**, and then choose **Install**. For further plugin help and instructions, refer to [Scala plugin setup for IDE](https://www.jetbrains.com/help/idea/scala.html). -- When you build the MXNet package with Scala, a JAR file called `mxnet-full_${scala.binary.version}-${platform}` is generated in `native/<your-architecture>/target` directory. You need this file to create an example package that has a dependency on MXNet. +2. Create a new project: -- Specify project dependencies in pom.xml: +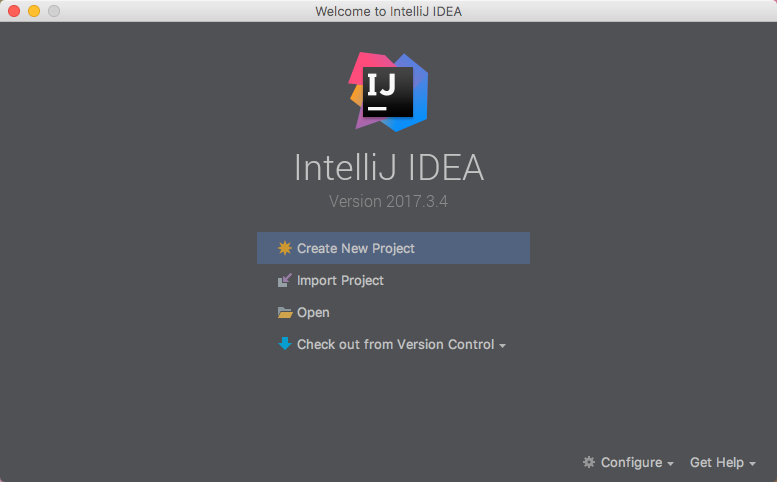 +From the IntelliJ welcome screen, select "Create New Project". -```HTML - <dependencies> - <dependency> - <groupId>org.apache.mxnet</groupId> - <artifactId>mxnet-full_${scala.binary.version}-${platform}</artifactId> - <version>0.1.1</version> - <scope>system</scope> - <systemPath>`MXNet-Scala-jar-path`</systemPath> - </dependency> - <dependency> - <groupId>args4j</groupId> - <artifactId>args4j</artifactId> - <version>2.0.29</version> - </dependency> - </dependencies> +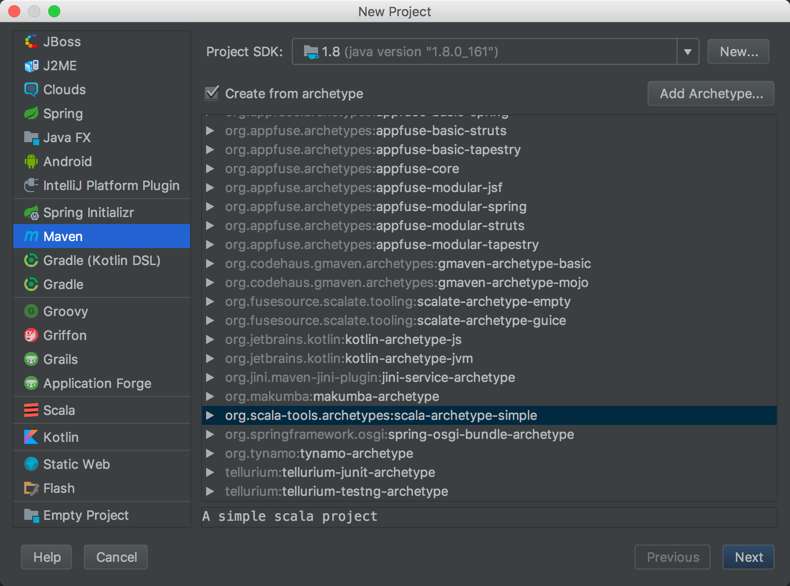 +Choose the Maven project type. + +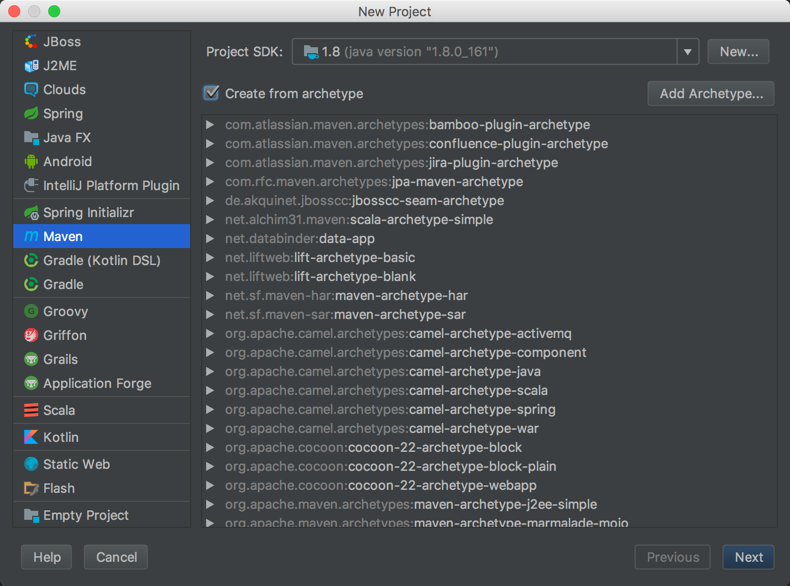 +Select the checkbox for `Create from archetype`. + +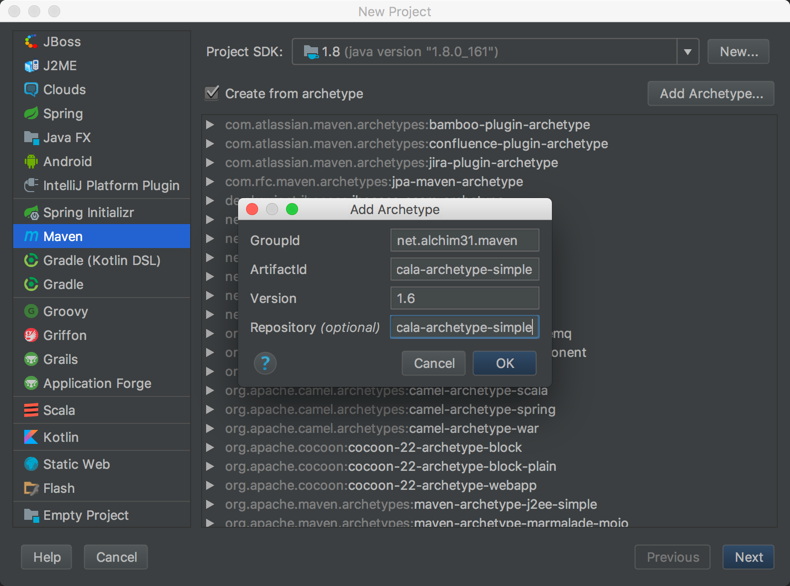 +Click the `Add Archetype` button, and add the following information to each field. + +**GroupId** +``` +net.alchim31.maven +``` +**ArtifactId** +``` +scala-archetype-simple +``` +**Version** +``` +1.6 +``` +**Repository** +``` +https://mvnrepository.com/artifact/net.alchim31.maven/scala-archetype-simple ``` -Be sure to change the system path of MXNet-Scala-jar, which is in the `native/<your-architecture>/target` directory. +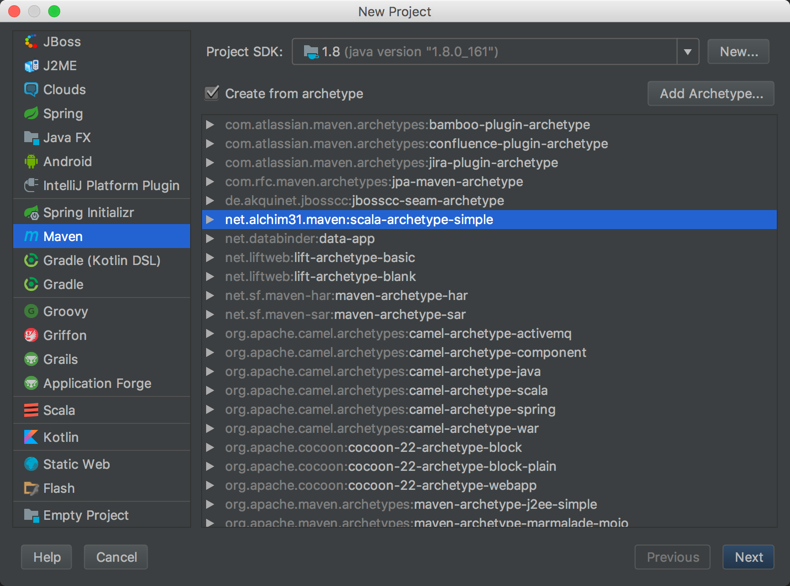 +Click `Ok` to add the archetype, make sure it is selected from the list, and then click `Next`. -- Choose the example project, choose Maven, and then reimport. These steps add all of the dependencies in pom.xml as external libraries in your project. +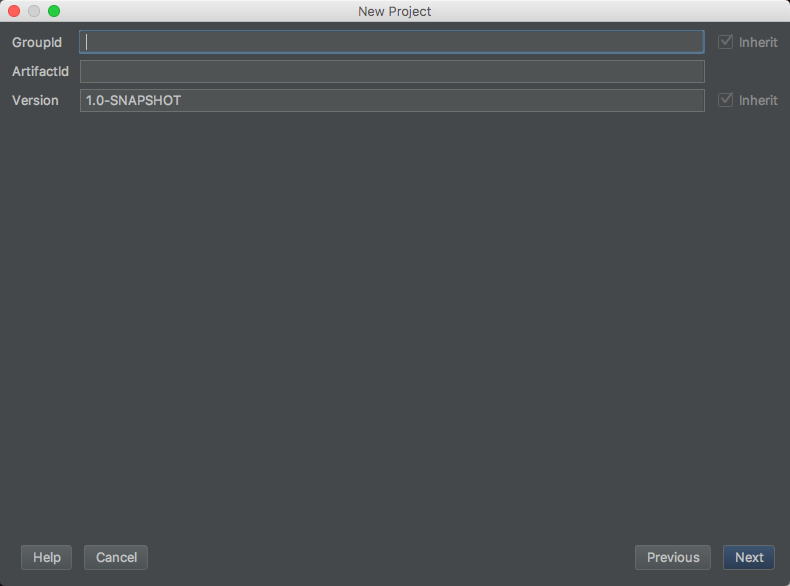 +Set the project's metadata. For this tutorial, use the following: -- To build the project, choose Menu, choose Build, and then choose Rebuild Project. If errors are reported in the IDE, address them. +**GroupId** +``` +your-name +``` +**ArtifactId** +``` +ArtifactId: scalaMXNet +``` +**Version** +``` +1.0-SNAPSHOT +``` + +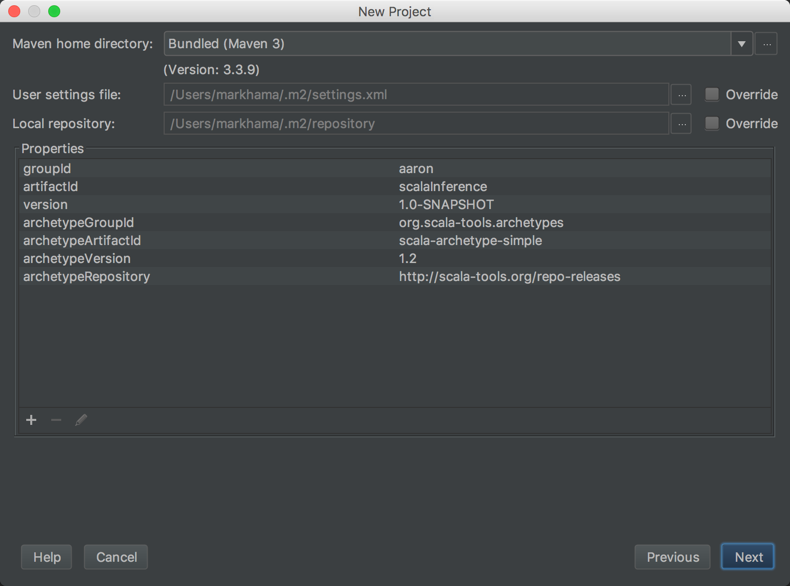 +Review the project's properties. The settings can be left as their default. + +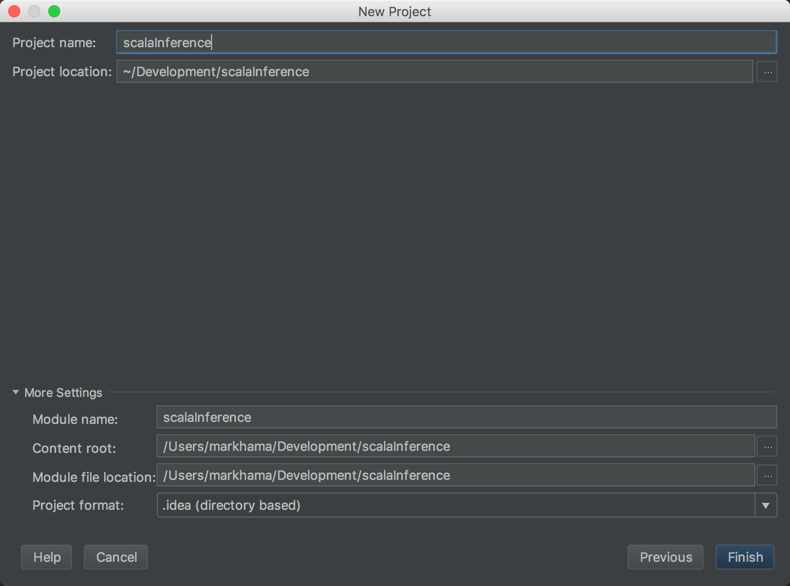 +Set the project's location. The rest of the settings can be left as their default. + +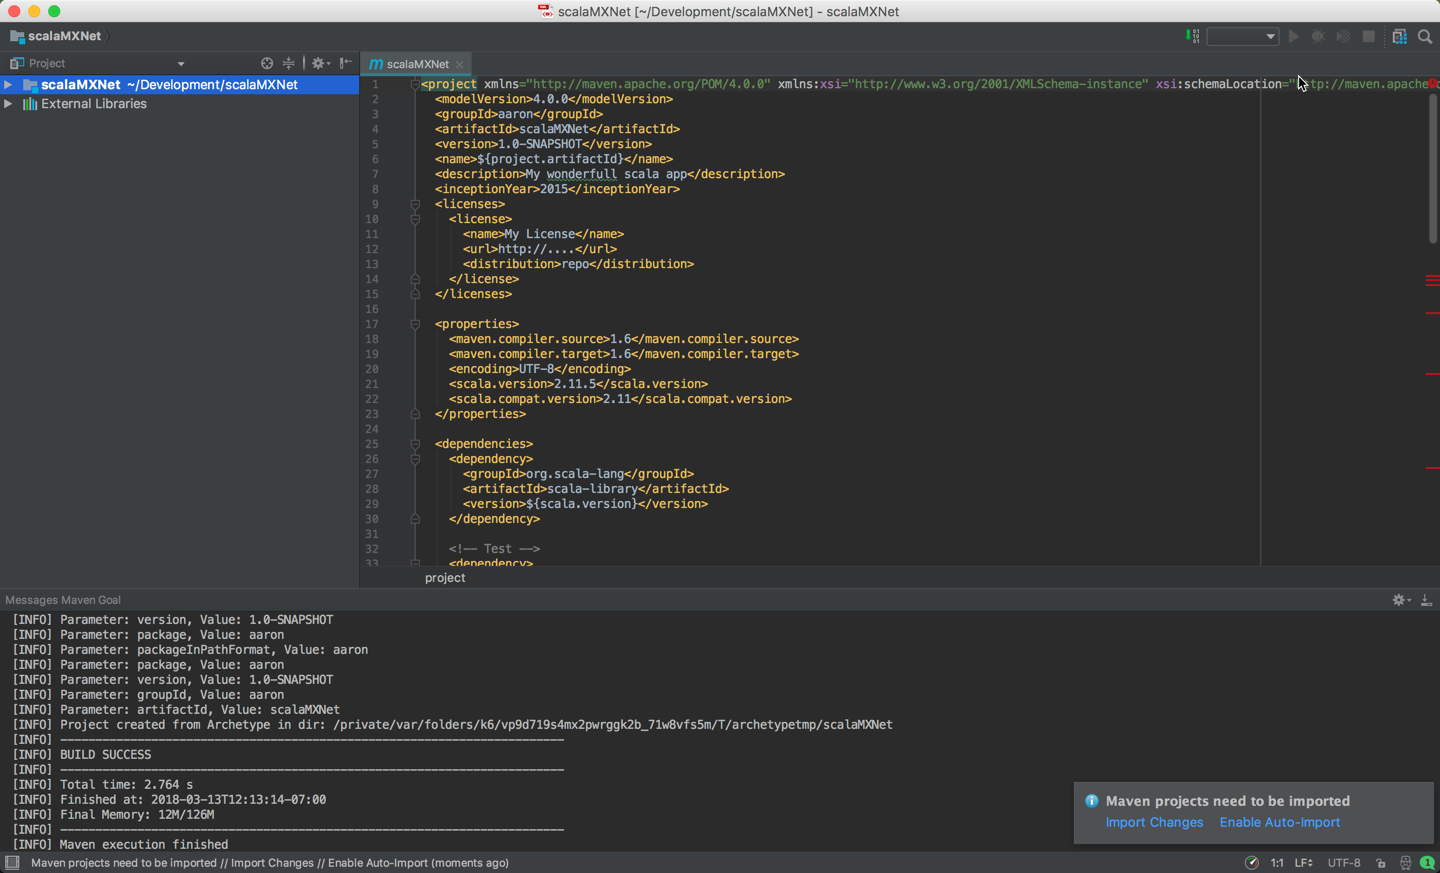 +After clicking Finish, you will be presented with the project's first view. +The project's `pom.xml` will be open for editing. + +3. Setup project properties: + - Specify project properties in `pom.xml` by pasting the following content in the `<properties>` tag. You will be overwriting the <scala.version> tag in the process, upgrading from `2.11.5` to `2.11.8`. + +```xml +<properties> + <scala.version>2.11.8</scala.version> + <scala.binary.version>2.11</scala.binary.version> +</properties> +``` + +4. Setup project profiles and platforms: +<!--TODO: add a Windows profile --> + - Specify project profiles and platforms in `pom.xml` by pasting the following content below the `</properties>` tag: + +```xml +<profiles> + <profile> + <id>osx-x86_64-cpu</id> + <properties> + <platform>osx-x86_64-cpu</platform> + </properties> + </profile> + <profile> + <id>linux-x86_64-cpu</id> + <properties> + <platform>linux-x86_64-cpu</platform> + </properties> + </profile> + <profile> + <id>linux-x86_64-gpu</id> + <properties> + <platform>linux-x86_64-gpu</platform> + </properties> + </profile> +</profiles> +``` + +5. Setup project dependencies: + + - Specify project dependencies in `pom.xml` adding the dependencies listed below. Place them inside the `<dependencies>` tag: + +```xml +<dependencies> + <!-- Begin deps for MXNet --> + <dependency> + <groupId>ml.dmlc.mxnet</groupId> + <artifactId>mxnet-full_${scala.binary.version}-${platform}</artifactId> + <version>1.2.0</version> + <scope>system</scope> + <systemPath>/Development/incubator-mxnet/scala-package/assembly/osx-x86_64-cpu/target/mxnet-full_2.11-osx-x86_64-cpu-1.2.0-SNAPSHOT.jar</systemPath> + </dependency> + <dependency> + <groupId>args4j</groupId> + <artifactId>args4j</artifactId> + <version>2.0.29</version> + </dependency> + <dependency> + <groupId>org.slf4j</groupId> + <artifactId>slf4j-api</artifactId> + <version>${slf4jVersion}</version> + </dependency> + <dependency> + <groupId>org.slf4j</groupId> + <artifactId>slf4j-log4j12</artifactId> + <version>${slf4jVersion}</version> + </dependency> + <!-- End deps for MXNet --> + <dependency> + <groupId>org.scala-lang</groupId> + <artifactId>scala-library</artifactId> + <version>${scala.version}</version> + </dependency> + <!-- Test --> + <dependency> + <groupId>junit</groupId> + <artifactId>junit</artifactId> + <version>4.11</version> + <scope>test</scope> + </dependency> + <dependency> + <groupId>org.specs2</groupId> + <artifactId>specs2-core_${scala.compat.version}</artifactId> + <version>2.4.16</version> + <scope>test</scope> + </dependency> + <dependency> + <groupId>org.specs2</groupId> + <artifactId>specs2-junit_${scala.compat.version}</artifactId> + <version>2.4.16</version> + <scope>test</scope> + </dependency> + <dependency> + <groupId>org.scalatest</groupId> + <artifactId>scalatest_${scala.compat.version}</artifactId> + <version>2.2.4</version> + <scope>test</scope> + </dependency> +</dependencies> +``` -- You can also compile the project by using the following command at the command line. + +Note the `<systemPath>` tag and update it to match the file path to the jar file that was created when you built the MXNet-Scala package. It can be found in the `mxnet-incubator/scala-package/assembly/{platform}/target` directory, and is named with the pattern `mxnet-full_${scala.binary.version}-${platform}-{version-SNAPSHOT}.jar`. + +5. Import dependencies with Maven: + + - Note the prompt in the lower right corner that states "Maven projects need to be imported". + + +Click "Import Changes" in this prompt. + +6. Build the project: +- To build the project, from the menu choose Build, and then choose Build Project. + +**Note**: During the build you may experience `[ERROR] scalac error: bad option: '-make:transitive'`. You can fix this by deleting or commenting this out in your `pom.xml`. This line in question is: `<arg>-make:transitive</arg>`. + +7. Run the Hello World App: +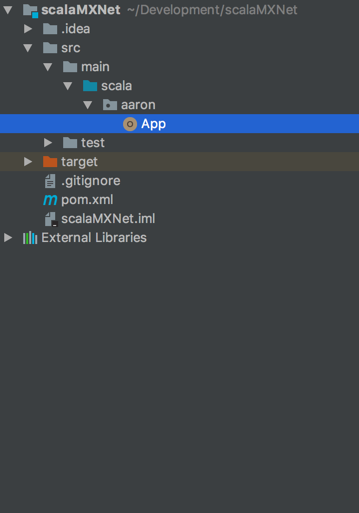 +Navigate to the App included with the project. + +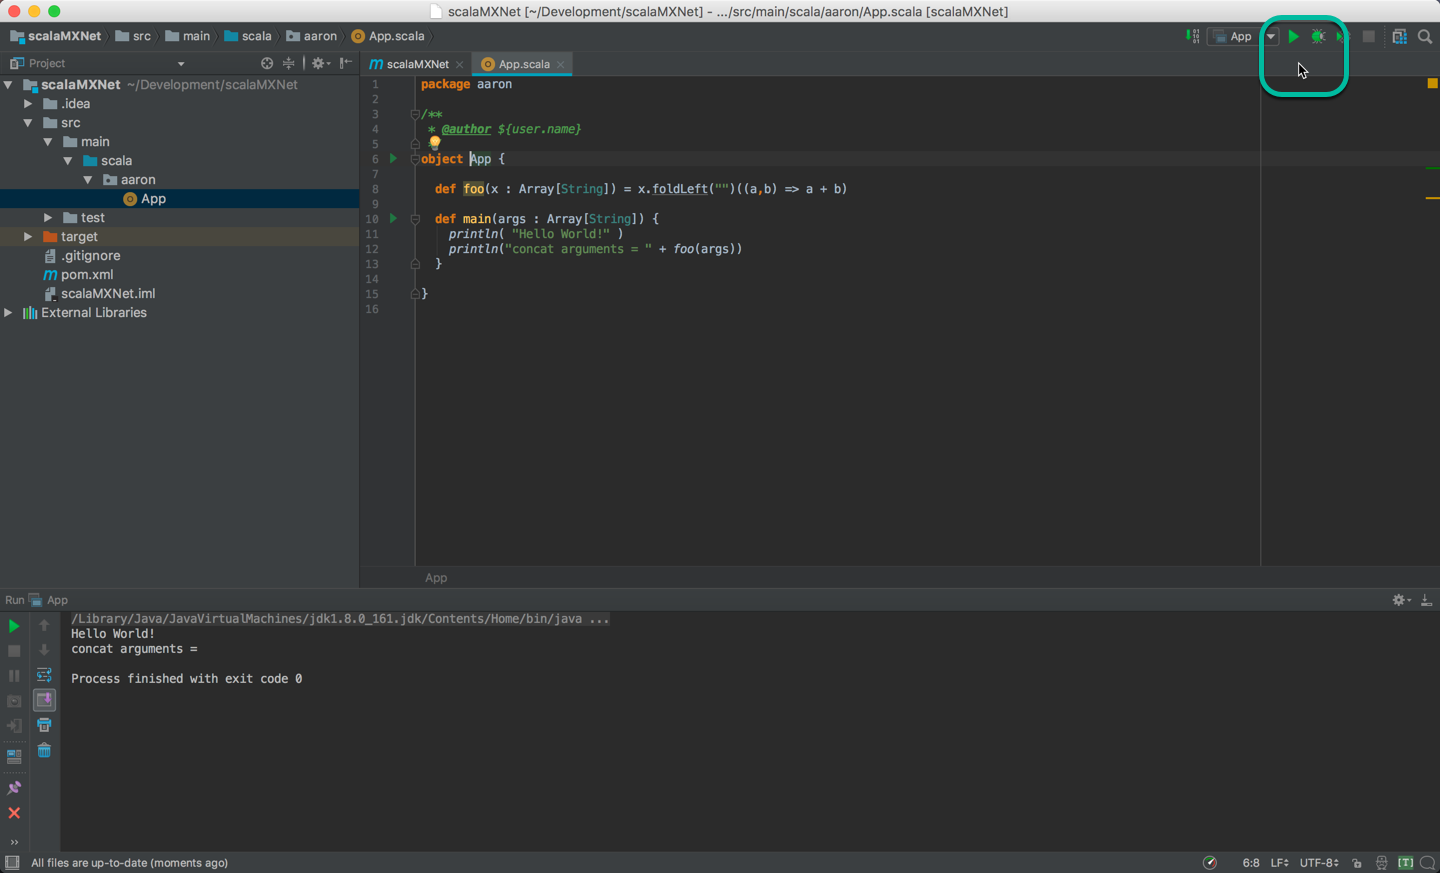 +Run the App by clicking the green arrow, and verify the Hello World output + +8. Run Sample MXNet Code in the App: + +Paste the following code in the App, overwriting the original hello world code. Then click the green arrow to run it. + +```scala +object App extends App { + import ml.dmlc.mxnet._ + import org.apache.log4j.BasicConfigurator + BasicConfigurator.configure() + + private val a = NDArray.ones(2, 3) + println("Testing MXNet by generating an 2x3 NDArray...") + println("Shape is: ") + println(a.shape) +} +``` + + +Your result should be similar to this output. + +### Command Line Build Option + +- You can also compile the project by using the following command at the command line. Change directories to this project's folder then run the following: ```bash - cd mxnet-scala-example - mvn clean package + mvn clean package -e -P osx-x86_64-cpu ``` +The `-P <platform>` parameter tells the build which platform to target. +The `-e` will give you more details if the build fails. If it succeeds, you should see a lot of info and some warning messages, followed by: -- This also generates a file called mxnet-scala-example-0.1-SNAPSHOT.jar for your application. +```bash +[INFO] ------------------------------------------------------------------------ +[INFO] BUILD SUCCESS +[INFO] ------------------------------------------------------------------------ +[INFO] Total time: 1.186 s +[INFO] Finished at: 2018-03-06T15:17:36-08:00 +[INFO] Final Memory: 11M/155M +[INFO] ------------------------------------------------------------------------ +``` +The build generates a new jar file in the `target` folder called `scalaInference-1.0-SNAPSHOT.jar`. ## Next Steps For more information about MXNet Scala resources, see the following: * [Scala API](http://mxnet.io/api/scala/) -* [More Scala Examples](https://github.com/dmlc/mxnet/tree/master/scala-package/examples/) +* [More Scala Examples](https://github.com/incubator-mxnet/tree/master/scala-package/examples/) * [MXNet tutorials index](http://mxnet.io/tutorials/index.html) ---------------------------------------------------------------- This is an automated message from the Apache Git Service. To respond to the message, please log on GitHub and use the URL above to go to the specific comment. For queries about this service, please contact Infrastructure at: us...@infra.apache.org With regards, Apache Git Services