Yilialinn commented on code in PR #2109:
URL: https://github.com/apache/apisix-website/pull/2109#discussion_r3869864820
########## blog/en/blog/2023/10/07/apisix-gitops-adc.md: ########## @@ -13,312 +13,210 @@ keywords: - Open Source - API Gateway - Apache APISIX -description: APISIX strengthens its integration with modern development and operational workflows by introducing the declarative configuration tool, ADC. + - GitOps + - ADC + - Declarative Configuration +description: "Use ADC lint, diff, sync, dump, and OpenAPI conversion commands in a reviewed GitOps workflow for Apache APISIX configuration." tags: [Community] image: https://static.apiseven.com/2022/10/19/634f6677742a1.png --- -APISIX strengthens its integration with modern development and operational workflows by introducing the declarative configuration tool, ADC. +ADC is a command-line tool for managing API gateway configuration declaratively. With Apache APISIX, teams can keep intended routes, services, upstreams, and other supported resources in version control, review changes, compare them with a target gateway, and synchronize an approved file. + <!--truncate--> -With the widespread adoption of cloud-native and microservices, the API gateway has emerged as a critical component for connecting and managing various microservices. However, as the number of services continues to grow and changes occur more frequently, the traditional imperative configuration has become increasingly challenging to manage and maintain. GitOps, on the other hand, is an operational model that leverages version control systems and automated workflows. By supporting declarative configurations, GitOps provides a more efficient, reliable, and traceable mode of operation. +ADC helps automate a workflow, but installing a CLI does not make the workflow GitOps by itself. A production design still needs review, protected credentials, environment promotion, drift policy, verification, and rollback procedures. -To enhance developing efficiency and operational reliability, APISIX has introduced a new tool that supports GitOps in a declarative manner. By embracing the declarative nature of GitOps, APISIX strengthens its integration with modern development and operational workflows. This integration enables smoother collaboration between developers and operations teams, promoting efficient and reliable management of the APISIX platform. +## What Declarative Gateway Configuration Changes -## Why Does APISIX Support GitOps Declarative Configuration +An imperative workflow sends a sequence of create, update, and delete requests. The history may show what commands ran, but it can be difficult to see the intended final state. -Although APISIX offers a stand-alone mode that allows configuration through YAML files, it lacks seamless integration with related ecosystems such as CI/CD tools like Jenkins and ArgoCD. While the APISIX Ingress Controller project makes significant strides in this area, APISIX itself does not provide a comprehensive set of declarative tools to support GitOps when used in non-Kubernetes environments such as bare metal or virtual machines. +A declarative workflow stores the desired state in a file and asks a tool to compare or reconcile that state with a target system. This can improve: -In traditional API gateway management, configurations and policies are typically manipulated using imperative methods, requiring manual modifications through command-line tools or management interfaces. This approach poses several challenges: +- **reviewability:** a pull request shows the intended configuration change; +- **repeatability:** the same approved input can be evaluated in another environment; +- **traceability:** commits connect a configuration version to its reviewer and deployment; +- **drift detection:** a diff can reveal changes made outside the controlled workflow; +- **recovery:** an earlier reviewed configuration is available as a rollback candidate. -- **Cumbersome Configuration Management**: Manual modifications of configurations are prone to errors, especially when dealing with large-scale gateways. +These properties depend on repository controls and deployment discipline. A declarative file can still contain an unsafe route, and synchronizing an old file can remove a valid production change. -- **Poor Traceability**: Tracking the change history and version control of configurations becomes difficult. +## What ADC Provides -- **Lack of Consistency**: Configuration discrepancies among multiple environments result in inconsistencies between development, testing, and production environments. +The current ADC command set includes workflows for: -The APISIX development team recognized several benefits of supporting GitOps in a declarative manner to effectively address these challenges: +- `adc lint` — check a declarative file before deployment; +- `adc diff` — compare a local file with the configured gateway; +- `adc sync` — synchronize the local desired state; +- `adc dump` — export supported configuration from the gateway; +- `adc convert openapi` — convert an OpenAPI document to declarative gateway configuration; +- `adc ping` — verify that ADC can connect to the configured server. -1. **Improved Developer Efficiency**: By using GitOps with a declarative configuration approach, developers can directly manage API gateway configurations by modifying and committing configuration files in the code repository. This method aligns with the development workflow that developers are familiar with, reducing the learning curve and tool-switching costs, and thus enhancing developer productivity. +Use `adc --help` and the [official ADC repository](https://github.com/api7/adc) for the exact flags supported by the installed release. Pin and test a tool version in automation rather than silently changing behavior when a new release becomes available. Review Comment: Fixed in 00d0278. The guide now links the ADC v0.30.0 APISIX backend matrix and limitations, states that the backend is experimental and APISIX 3.18.x is untested, summarizes unsupported resources, and requires a disposable-environment round trip before production sync. ########## blog/en/blog/2021/08/25/Using-the-Apache-APISIX-OpenID-Connect-Plugin-for-Centralized-Authentication.md: ########## @@ -12,255 +12,173 @@ authors: image_url: "https://avatars.githubusercontent.com/u/36651058?v=4"; keywords: - API Gateway - - APISIX - Apache APISIX - - Okta - - Authorization -description: Simplify API authentication by using the APISIX openid-connect plugin to centralize identity verification at the gateway level. + - OpenID Connect + - OIDC Authentication + - Centralized Authentication +description: "Learn how the APISIX openid-connect plugin validates tokens or runs the OIDC authorization code flow before proxying requests upstream." tags: [Authentication, Plugins, Ecosystem] image: https://static.apiseven.com/2022/blog/0818/plugins/openid%20connect.png --- -> Compared with the traditional authentication mode, the centralized authentication mode has the following advantages: first, it simplifies the application development process, reduces the development application workload and maintenance costs, and avoids repeated development of authentication code for each application; second, it improves business security, and the centralized authentication mode can intercept unauthenticated requests at the gateway level in time to protect back-end applications. +The Apache APISIX `openid-connect` plugin can integrate gateway routes with an OpenID Connect identity provider. It can validate bearer tokens for API clients or run the authorization code flow for browser-based applications. This centralizes supported authentication checks at the gateway while leaving resource-level authorization in the application that owns the data. <!--truncate--> -## What is Apache APISIX +## OpenID Connect in an API Gateway -[Apache APISIX](https://apisix.apache.org/) is a dynamic, real-time, high-performance API gateway that provides rich traffic management features such as load balancing, dynamic upstream, canary release, service meltdown, authentication, observability, and more. Apache APISIX's OpenID Connect plug-in supports OpenID, which allows users to replace authentication from traditional authentication mode to centralized authentication mode. +[OpenID Connect (OIDC)](https://openid.net/developers/how-connect-works/) is an identity layer built on OAuth 2.0. An identity provider publishes metadata, authorization and token endpoints, and signing keys. A relying party validates the resulting tokens and their claims. -## What is authentication +When APISIX protects a route, it acts as an OIDC relying party or token-validating resource-server component, depending on the configured mode: -Authentication refers to the verification of a user's identity through certain means. The application identifies the user through authentication and obtains detailed user metadata from the Identity Provider based on the user identity ID, and uses it to determine whether the user has access to the specified resources. Authentication modes are divided into two categories: **Traditional Authentication Mode** and **Centralized Authentication Mode**. +- **Authorization code flow:** a browser without an authenticated session is redirected to the identity provider. APISIX processes the callback, establishes a session, and then proxies the request. +- **Bearer-only mode:** an API client sends an access token. APISIX validates the token and rejects missing or invalid credentials instead of redirecting the client. -### Traditional authentication mode +These modes serve different clients. Redirecting a machine client to a login page is usually incorrect; accepting bearer tokens without the intended issuer, audience, scope, and signature checks is unsafe. -In traditional authentication mode, each application service needs to support authentication separately, such as accessing the login interface when the user is not logged in, and the interface returns a 301 jump page. The application needs to develop the logic for maintaining the Session and the authentication interaction with the identity provider. The flow of the traditional authentication model is shown in the figure below: first, the user initiates a request, then the gateway receives the request and forwards it to the corresponding application service, and finally the application service interfaces with the identity provider to complete the authentication. +## What Centralized Authentication Does—and Does Not—Do - +Applying authentication at the gateway can: -### Centralized authentication mode +- give multiple routes a consistent integration with the same identity provider; +- reject unauthenticated traffic before it reaches an upstream service; +- reduce repeated OIDC protocol handling in individual edge-facing applications; +- attach validated token information to a trusted upstream request when configured. -Unlike the traditional authentication model, the centralized authentication model takes user authentication out of the application service. Take Apache APISIX as an example, the centralized authentication process is shown in the following diagram: first, the user initiates a request, and then the front gateway is responsible for the user authentication process, interfacing with the identity provider and sending the identity provider an authorization) request to the identity provider. The identity provider returns user info. After the gateway identifies the user, it forwards the user identity information to the back-end application in the form of a request header. +It does not automatically implement all authorization. A valid identity may still be unable to read a specific account, change another user's resource, or perform an administrative action. Services should enforce domain- and resource-level permissions using trusted identity context. - +The upstream must also be unable to receive spoofed identity headers directly from an untrusted client. Restrict upstream network access and configure the trusted proxy boundary so that only APISIX sets or forwards the identity headers the application consumes. -Compared with the traditional authentication mode, the centralized authentication mode has the following advantages. +## Prerequisites -1. simplify the application development process, reduce the development of application workload and maintenance costs, to avoid the repeated development of each application authentication code. -2. improve business security, centralized authentication mode at the gateway level to intercept unauthenticated requests in time to protect the back-end applications. +Before configuring the plugin: -## What is OpenID +1. Create an OIDC client at the identity provider. +2. Record the issuer's discovery URL, normally ending in `/.well-known/openid-configuration`. +3. Register the exact redirect URI used by APISIX for an authorization code flow. +4. Decide which scopes and claims the API requires. +5. Store the client secret and session secret in protected configuration; do not commit production values to source control. +6. Ensure APISIX can reach the discovery, authorization, token, user-information, and key endpoints required by the selected flow. -OpenID is a centralized authentication model, which is a decentralized identity system. The benefit of using OpenID is that users only need to register and log in with one OpenID identity provider's website and use one account password information to access different applications. okta is a common OpenID identity provider and the Apache APISIX OpenID Connect plugin supports OpenID so users can use the plugin to to replace the traditional authentication model with a centralized authentication model. +Use HTTPS for the identity provider and public application route. The plugin's TLS verification should remain enabled; the current default for `ssl_verify` is `true`. -### OpenID Authentication Process +## Configure Authorization Code Flow -The OpenID authentication process has the following 7 steps, as shown in the figure below. 1. - -1. APISIX initiates an authentication request to Identity Provider. 2. -2. The user logs in and authenticates on the Identity Provider. 3. -3. The Identity Provider returns to APISIX with the Authorization Code. 4. -4. APISIX requests the Identity Provider with the Code extracted from the request parameters. 5. -5. The Identity Provider sends an answer message to APISIX containing the ID Token and Access Token. 6. -6. APISIX sends the Access Token to the Identity Provider's User Endpoint to obtain the user's identity. -7. After authentication, the User Endpoint sends the User info to APISIX to complete the authentication. - -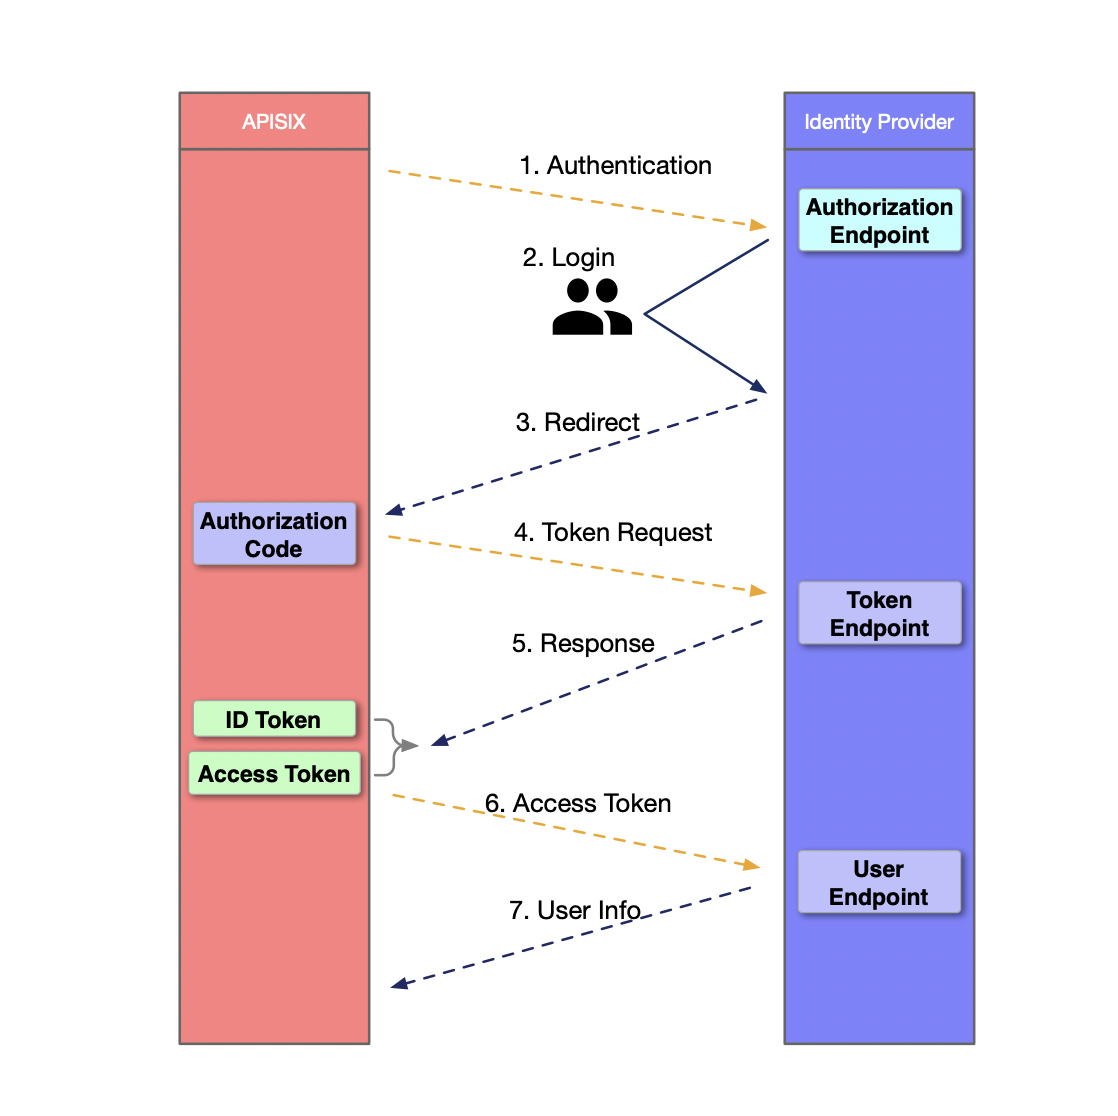 - -## How to configure Okta authentication using the OpenID Connect plugin for Apache APISIX - -Configuring Okta authentication using the Apache APISIX OpenID Connect plug-in is a simple three-step process that allows you to switch from traditional to centralized authentication mode. The following section describes the steps to configure Okta authentication using the OpenID Connect plug-in for Apache APISIX. - -### Prerequisites - -An Okta account already exists. - -### Step 1: Configure Okta - -1. Login to your Okta account and create an Okta application, select the OIDC login mode and the Web Application application type. -  -  2. -2. Set the login and logout jump URLs. -The "Sign-in redirect URIs" are the links that are allowed to be redirected after successful login, and the "Sign-out redirect URIs" are the links that are redirected after logging out. In this example, we set both the sign-in redirect and sign-out redirect URLs to `http://127.0.0.1:9080/`. -  -3. Click "Save" to save the changes after finishing the settings. - 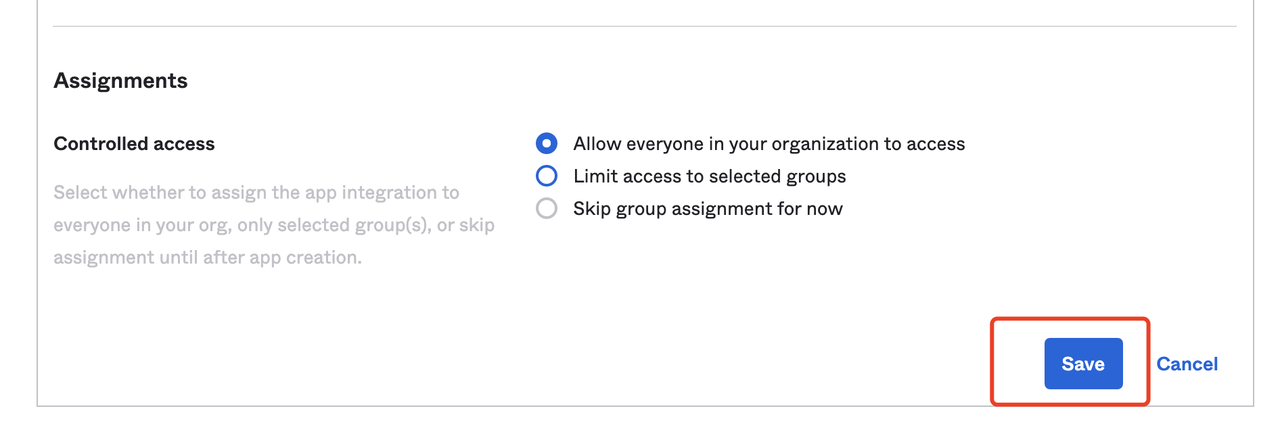 -Visit the General page of the application to get the following configuration, which is required to configure Apache APISIX OpenID Connect. - -- Client ID: OAuth client ID, which is the ID of the application, corresponding to `client_id` and `{YOUR_CLIENT_ID}` below. -- Client secret: OAuth client secret, i.e. application key, corresponds to `client_secret` and `{YOUR_CLIENT_SECRET}` below. -- Okta domain: The domain name used by the application, corresponds to `{YOUR_ISSUER}` in discovery below. - -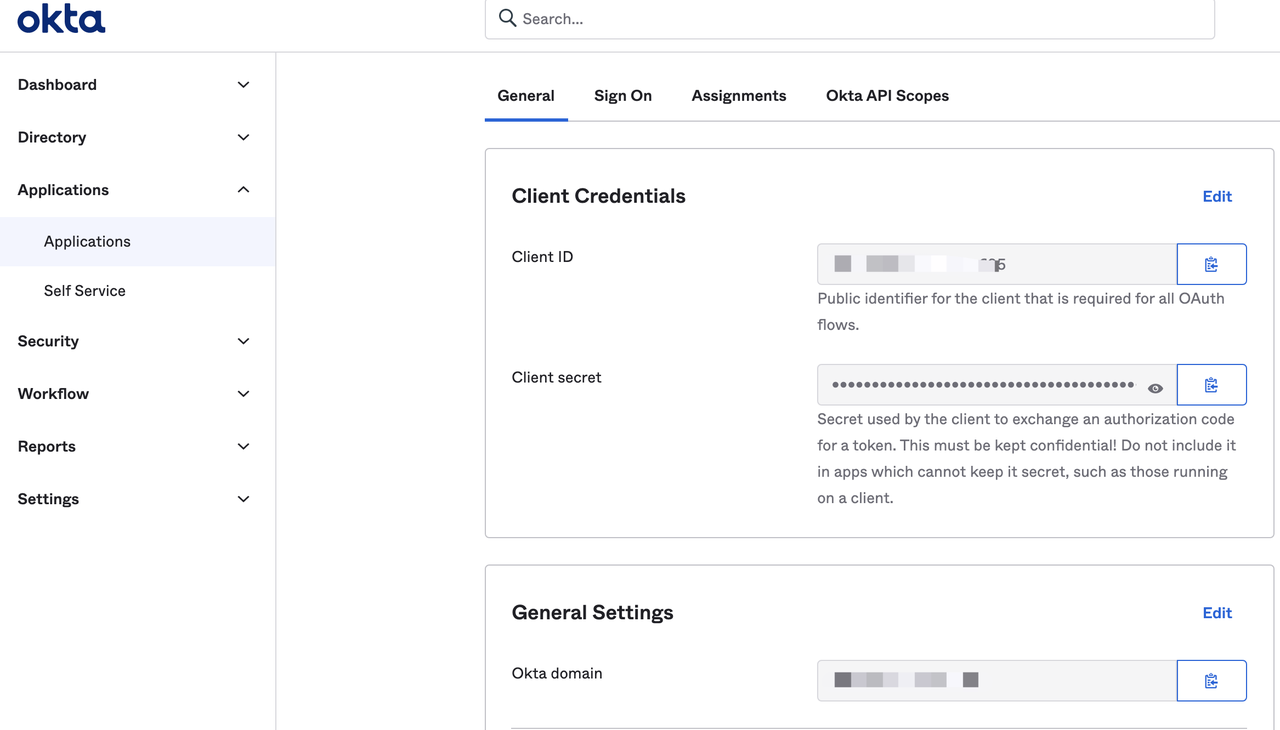 - -### Installing Apache APISIX - -You can install Apache APISIX in a variety of ways such as through source packages, Docker, Helm Chart, etc. - -#### Installing dependencies - -The Apache APISIX runtime environment requires dependencies on NGINX and etcd, so before installing Apache APISIX, please install the corresponding dependencies according to the operating system you are using. We have provided steps for installing dependencies on CentOS7, Fedora 31 & 32, Ubuntu 16.04 & 18.04, Debian 9 & 10 and MacOS, please refer to [Installing dependencies](https://apisix.apache.org/zh/docs/apisix/install) for details. -dependencies/). - -When installing Apache APISIX via Docker or Helm Chart, the required NGINX and etcd are already included, please refer to the respective documentation. - -#### Installation via RPM package (CentOS 7) - -This installation method is available for CentOS 7 operating system, please run the following command to install Apache APISIX. +The following Admin API request illustrates the relevant fields. Replace the example identifiers and upstream with values from your environment. ```shell -sudo yum install -y https://github.com/apache/apisix/releases/download/2.7/apisix-2.7-0.x86_64.rpm +curl "http://127.0.0.1:9180/apisix/admin/routes/oidc-browser"; \ + -X PUT \ + -H "X-API-KEY: $admin_key" \ + -d ' +{ + "uri": "/app/*", + "plugins": { + "openid-connect": { + "client_id": "<oidc-client-id>", + "client_secret": "<oidc-client-secret>", + "discovery": "https://id.example.com/.well-known/openid-configuration";, Review Comment: Fixed in 00d0278. The authorization-code example now configures one fixed external redirect_uri under the /app/* route and tells readers to register that exact URL with the identity provider. It also sets logout_path to /app/logout so the same protected route handles logout. -- This is an automated message from the Apache Git Service. To respond to the message, please log on to GitHub and use the URL above to go to the specific comment. To unsubscribe, e-mail: [email protected] For queries about this service, please contact Infrastructure at: [email protected]