On Mon Dec 17, 2007, Ken Ray kray at sonsothunder.com wrote:
 The only thing I could
think of would be to make it a multi-step process:

1) Take the original image (img "orig"), duplicate it (img "dupe") and
lock its loc.
2) Set the rect of "dupe" to the same size as the polygon
3) Make a new image object (img "stretch") that has the same size as
the copy.
4) Set the imageData of the "stretch" to the imageData of "dupe"
5) Set the backgroundPattern of the polygon to "stretch"

This of course couldn't happen dynamically in real time without
stuttering, etc., especially on larger images. I miss SuperCard's
manipulation of pictureData in Revolution (you can do all sorts of
other things too like setting offsets, magnification etc.) - it would
be a great addition to Rev...


Ken Ray
Sons of Thunder Software, Inc.
In my reply of Nov 29 to thread "Any suggestions on how to "onion
skinning"?" I had mentioned some new features of my upcoming release of
the "Imagedata Toolkit" - among them
"copying - and enlarging or shrinking - and pasting oval or rectangular
portions of an image into the same or another image with variable fringe
and/or overall blending into the basic image)."
I applied this to a photo of a not unknown public figure, the result can
be inspected here:
<http://www.sanke.org/Software/SmilingBush.jpg>.
To achieve this I used a number of steps, in which about two of Ken's
five steps are applied, but most of which follow a different sequence
and are of another nature.
The basis for the "copying - and enlarging or shrinking - and pasting
oval or rectangular portions of an image" are rects, ovals, and
polygons in the form of images with transparent fringes of different sizes.
I use a rectangular or oval graphic as a selection tool that can be
resized and dragged across the photo to select a portion of it (This
selection tool is similar to that used in my "seamless tiles 2" stack).
The underlying image - the partially tranparent basic template - is then
adjusted in location and size to the selected portion of the photo.
At the same time an already existing empty image "newimage" is also set
to the selected portion of the image.
The imagedata of the selected portion of the photo are then read into
the "newimage", and the alphadata of the template are applied to the
"newimage".
You can then enlarge or shrink "newimage" or leave it as it is and
drag it to any place on the photo. You can also flip "newimage".
Next step is to integrate the image- and alphadata of "newimage" into
the photo, either once or several times at different places. This
integration can be applied with variable levels of blending, in
addition to the transparent fringe of the template that ensures optimal
blending into the photo.
If an enlarged portion of "newimage" should have been dragged to a
position where it overlaps the rect of the photo, the overlapping parts
of "newimage" are then cut off in the process of integration.-
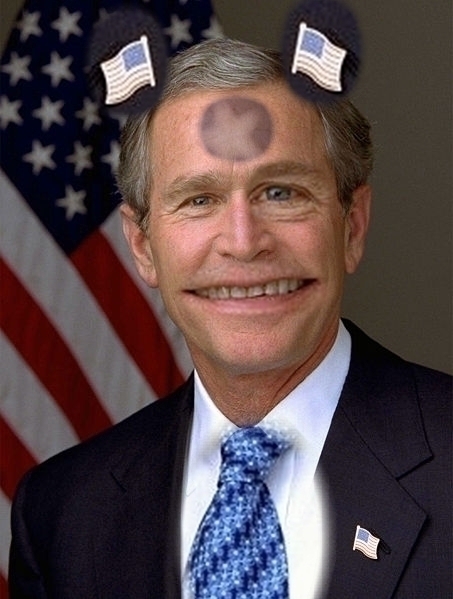
For "SmilingBush" I have only used a single oval template. The star -
taken from the left side - on his forehead - is partially blended. One
of the flags - taken from his lapel - has been flipped.-
I hope I do not cause trouble with this attempt of a caricature - as it
happens in other parts of the world. Bush is indeed a known public
figure and as such often the object of caricatures.
Best regards,

Wilhelm Sanke

<http://www.sanke.org/MetaMedia>


_______________________________________________
use-revolution mailing list
use-revolution@lists.runrev.com
Please visit this url to subscribe, unsubscribe and manage your subscription
preferences:
http://lists.runrev.com/mailman/listinfo/use-revolution